Welcome to Week 3! We’re now over halfway through our guide to helping you turn great ideas into reality, using innovative technology and a little brain power. Starting now, we’ll take all of our work during discovery, immersion, and ideation and boil it all down into something real. This week is all about the Workshop. It’s the culmination of all the work we’ve done throughout the previous phases, and, spoiler alert: it’s the most fun. This is the moment to take action.
Workshop Setup
For the Workshop, the key word is prototype. Honestly, if you don’t walk out of the Workshop with a prototype to test (no matter how small or simple or completely childish you think it might be), you’re missing out on maybe the key fundamental of this entire guide. Head straight into the scary unknown and make something. Trust us when we say, you’ll learn far more from the process than you ever realized, and it just might make your project. So let’s get building! ?
To get started, you won’t need fancy software, a professional illustrator, the perfect space, or perfect materials. You definitely don’t need to spend money if you don’t want to. The materials we suggest using could almost certainly be found on your desk or in a nearby drawer. Get the creative juices flowing and think about how to play — embrace your inner kindergarten-self. 🙂
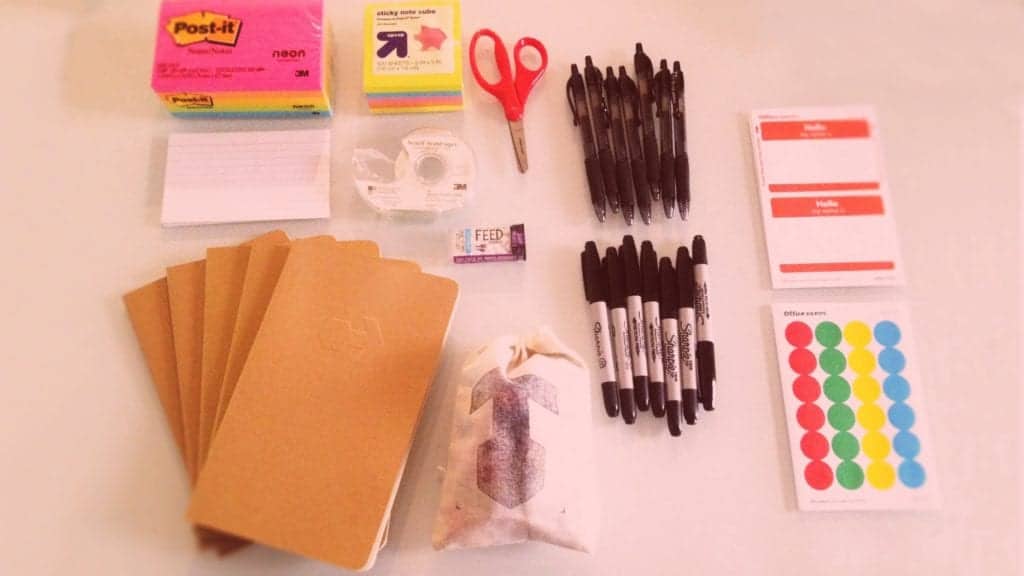
Things to Bring to the Workshop:
Basic white printer paperScotch tapeScissorsPens and SharpiesPost-Its (duh.)Sticker dots (or a way to visualize a vote)A computer + tablet or smart phoneOptionally: We’ll talk more about some software tools in a second
Running the Workshop
Now that we’ve looked ahead a bit, let’s step back into some details of what a great Workshop looks like. As before, feel free to make it your own; this is just a starting point.
You’ll notice that the timeline this week is a good bit longer than the others. We’ve learned that doing this in a day is really hard, but it is also really rewarding to ask yourself to do so much so quickly. Days like these are long (and you may need more than one), but this is a great place to start.
- 30 minutes — Review + Plan Direction
- 2 hours — Working Session 1 + Internal Prototyping
- Lunch!
- 2 hours — Working Session 2
- 2 hours — Running Prototypes
- 30 minutes — Learnings and Next Steps
Total: Full day
Review + Plan
As you kick things off, quickly recap the problem with the team. Put it front and center in the room (or put it smack dab at the top of a Google Doc or screenshare) and review the goals you want to achieve in the Workshop. First, focus the team on discussing the running ideas and which ones seem to still be at the top. Take this time to visualize and list them, or maybe use Post-its to build a hierarchy of things you want to solve. Encourage the team to take some time expressing their feelings and opinions, and ask everyone to pair each idea with a thought for how to prototype it.
Direction Selection
After generating and exploring again quickly, it’s important to focus the team on idea selection and a direction to move forward. We’ve learned that ideally in a Workshop the team is building on one to three ideas (but no more than that) at any given time.
To help you decide where to focus, here are a few ideas we like to use:
- Voting — This can help encourage your team to start making a few hard decisions. To run a quick voting session, give everyone a limited number of votes (sticker dots on the wall or checks on the whiteboard work well) and see what ideas standout. After voting ends, look at the results together and talk about what this new viewpoint means. This could be a time to combine ideas as you notice overlaps too.
- Focus on a Minimum Viable Product (“MVP”) — We encourage you to use the concept of an MVP to guide this focusing discussion. Ask questions that decide what features are absolutely critical to make this innovation successful, and focus the team towards ideas that meet the needs of the problem statement in the simplest way. Keep in mind, the MVP is just the first step, and it might only apply to your prototype, so park the great ideas that might not be critical and bring them in in a future update.
Prototyping: Where to Start
Now that you have those MVP ideas cooking, we’re at that time to officially start using the magic prototyping word. And to be extra super-duper clear: every idea you have should involve a prototype. Period. It’s never enough to leave the idea as a bit of text on the whiteboard. You must give it life.
Working Session 1 + Internal Prototyping
In your first working session, focus on how low-fidelity you can start building. Look at what you have around you or people outside of the group whom you could quickly test with. Maybe it’s a prototype to run through a scripted conversation to test a voice recording system? Or maybe some paper and staples could create a phone screen? No matter what you decide, build just enough to prove the concepts and test with some touchpoints. During the session, stay focused on learning and iterating quickly, and remember: Drawing interfaces on the whiteboard is a form of early prototyping. And as you start to get more refined, we’ll talk about more of our favorite prototyping methods.
Do you remember the rhythm we talked about it when we kicked things off? Trying, failing, iterating, and repeating.
Hopefully you’ve been living this throughout the process, but if not, now is the perfect time to start. As we think about how helpful iteration and failure can be, prototyping becomes a lot simpler to understand. And more fun. We’re going to fail and play and iterate our way to something real. In that same line of thinking, start getting prepared to put your prototypes in the hands of real people. Asking them to test the experience will multiply your learning and help refine your concept. Failing with a user could seem harder, but embracing the idea that it’s a good thing makes the whole process easier.
Prototyping Options
As we talk about prototyping, we’ll focus on showing you examples of ways we’ve done this well in the past. And ways we’ve failed. While there’s a million ways to run a prototype, the ones we keep coming back to the most fall into three basic categories: Paper, Digital, and Experience.
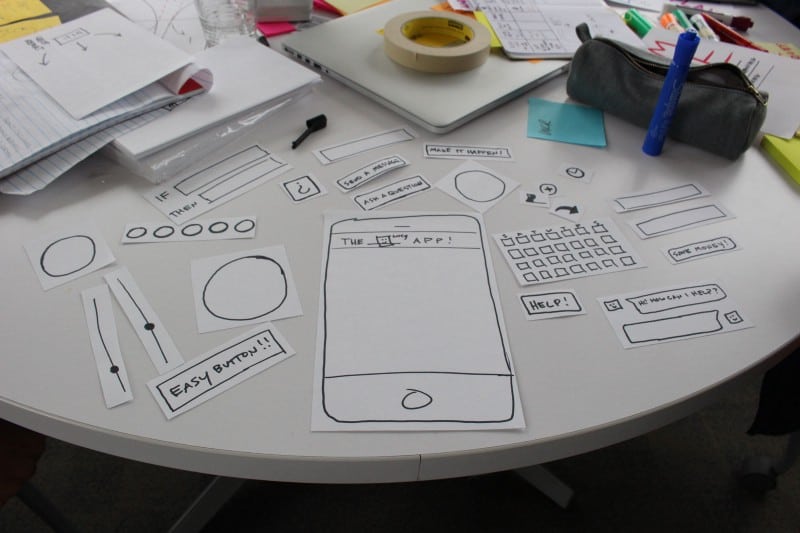
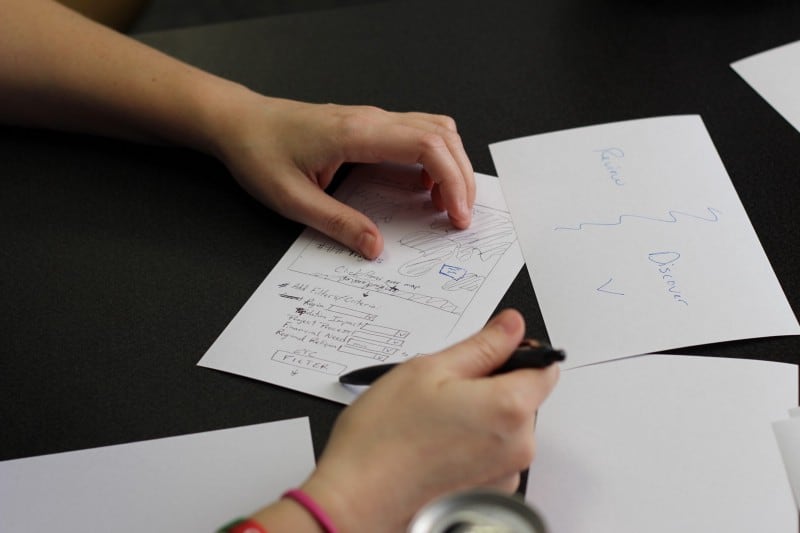
Paper Prototypes
One of our favorite ways to prototype is with a few sheets of paper, some tape, markers and scissors. It’s cheap and easy, and will allow your mind to think in small and iterative ways.
Recently, when we were prototyping a website experience with a partner, we knew the basics we wanted to include, but we weren’t exactly sure on the order or experience, and most importantly, we wanted the input of others. So we set up a website framework made of paper with optional panels that could change with user “clicks” (aka, the testers pointing at a button with their finger). Each new “click” brought in a new sheet of paper, and just like a website reloading, we reloaded our paper prototype. Then, as the tester went through the site, we acted as the guide, progressing the paper experience and even modifying it on the fly as we tested.
To help you see the process better, check out this quick video:
Digital Prototypes
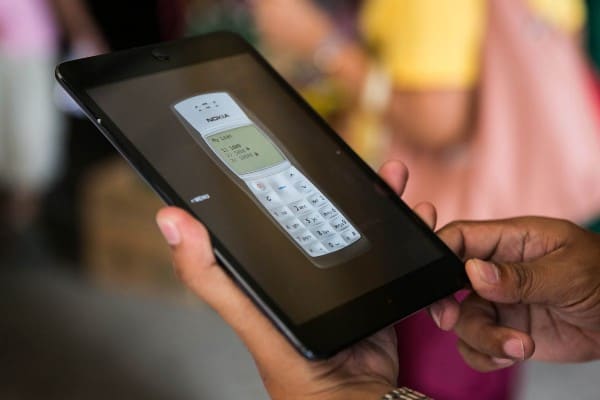
Just like a paper prototype, the goal here is to work quickly, but sometimes that can be done with technology first. Let’s say you are testing an app for workers to use in the field: The nice thing about this approach is that rather than paper, you‘re testing with a physical device that’s real and familiar.
Or, for example, maybe you’re testing a social enterprise startup and need to gauge customer interest. Set up a free Squarespace trial site in a few hours and go! The added benefit of this approach is that if the test is successful, you’re already a step ahead of the game.
In the examples below we used InVision andKeynote for iOS to put digital prototypes in people’s hands on real devices. InVision has a great suite of tools you can use to test prototypes offline without an internet connection needed. Using a presentation in Keynote for iOS (using Links to advance to other slides) can allow you to make edits to prototypes even during test iterations. Just open the Keynote file on the device, make a quick edit, then run it again.

Experience Prototypes
Maybe what you actually need is a prototype of an experience, like a sales cycle, a customer interaction, or even a game to play with people to test their reaction to a concept. At first, this may not seem easily “testable,” but the truth is, any test is a good test, so start getting creative. Maybe you need to test a commercial for your fundraiser. Get some poster board, cut out a TV frame, and act out your commercial script!
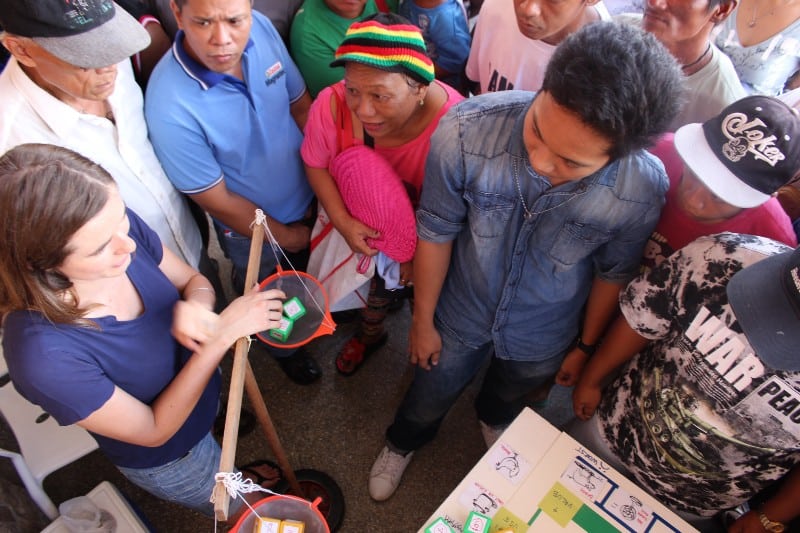
In the photo above we were testing a mobile financial product in the Philippines, and we wanted to learn more about how people think about their finances. We decided to build a scale, allowing people to “weigh” their opinions and see which ideas might be most valuable to them. It was a great idea! So we bought some materials and got to work. We arrived to the market the next morning, excitedly setup our experience… and it failed royally in the first 5 minutes. People didn’t get it at all! But by gauging people’s reactions to our first experience, we quickly pivoted to another successful test. What we learned couldn’t be expected, but we tried, and failed, and then quickly iterated towards an idea that worked. The main thing we did right: simply being there with a listening mindset.
Learning and Next Steps
After you complete your prototypes, get together with your team and talk about what you learned. How did it feel to prototype? What worked? What didn’t? Most importantly: What did you learn?And what changes should you make based on those learnings?Take a few minutes and get together with your team to talk about the day and plan some next steps.
In our next installment, we’ll close up shop on ideation and testing and help you pave the way towards a proper build phase. We’ll help you Roadmap a path to success and talk about how to synthesize what you learned in your prototypes into something actionable moving forward. It’s gonna be fun!